

The “Brow Lift” Hair Hack: Does Anne Hathaway’s Secret Weapon Actually Work?
The glitz and glamour of awards season often bring with them a wave of beauty trends, and this year’s Oscars were no exception. While many stars showcased their perfected dewy skin and sculpted features, one particular hairstyling trick caught our attention: the “brow lift” achieved with hidden mini plaits. Promising an instant eye-lift without any invasive procedures, it sounds like a dream come true for those of us battling the tell-tale signs of fatigue.
After seeing this technique making waves online, particularly in a video shared by actress Anne Hathaway, a curiosity sparked. Could this simple hair hack deliver a refreshed, more lifted appearance, or was it just another fleeting trend destined to fade? As someone who’s found themselves looking a little more tired than they’d like lately, the prospect of a quick, no-cost fix was incredibly appealing.
Unpacking the “Brow Lift” Technique
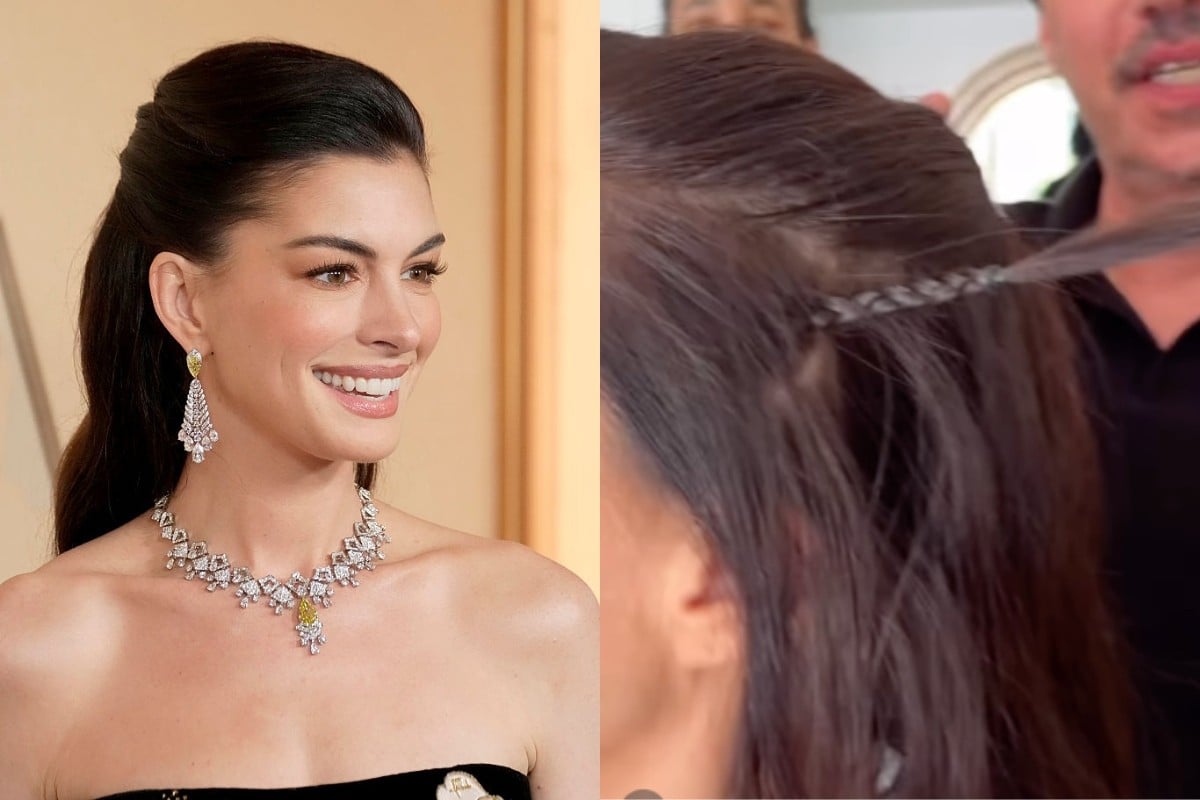
The core idea behind this hairstyle is to use small, strategically placed plaits to gently pull back the skin around the temples, creating an illusion of a lifted brow and a more open, alert eye. It’s akin to a subtle form of face taping, but achieved with your own hair. While not entirely novel – celebrities like Charli XCX have been known to sport similar styles – the specific execution shared by Hathaway’s hairstylist, Orlando Pita, seemed to offer a particularly effective method.
The appeal lies in its accessibility. Unlike many beauty trends that require a trip to the shops or a significant investment, this hack relies on tools most people already have at home. For anyone juggling a busy schedule and perhaps feeling a bit drained, the promise of a quick, DIY facelift is hard to resist.
How to Achieve the Faux Brow Lift: A Step-by-Step Guide
Intrigued, I decided to put this technique to the test. Here’s a breakdown of how I attempted to recreate Anne Hathaway’s “faux brow lift”:
What You’ll Need:
- Mini hair elastics: These are the small, often brightly coloured elastics that resemble loom bands. Thankfully, raiding a tween’s hair accessory stash proved fruitful!
- Claw clip: For sectioning and securing the hair.
The Process:
- Section Your Hair: Begin by sectioning off the top portion of your hair and securing it with a claw clip to keep it out of the way. This will form the “half-up” part of the style.
- Create Small Sections: Take two small sections of hair, each less than an inch wide, from just behind your temples.
Plait with Purpose: Braid each of these sections, angling them towards the back of your head. The crucial element here is the direction of the braid. You want to braid upwards and backwards towards the crown of your head, not downwards towards your ears. This ensures the braids lie flat when you pull them back later.
- Pro Tip: If you don’t mind your braids being visible, you can take the hair sections slightly further forward at the temples. This can create an even tighter pull, but also potentially more discomfort.

Anne on the 2026 Oscars red carpet, and breaking the ‘glam’ fourth wall. Images: Getty, Instagram @annehathaway.
- Pro Tip: If you don’t mind your braids being visible, you can take the hair sections slightly further forward at the temples. This can create an even tighter pull, but also potentially more discomfort.
Secure the Plaits: Bring the two plaits together at the centre-back of your head. Pull them taut to create a gentle tension that lifts the skin around your temples. Secure the ends together with one of the mini elastics. Think of it as creating a subtle “tension bridge.”
- Conceal and Finish: Take the top section of your hair that you initially clipped away and use the same claw clip to secure it over the top of the plaits. This will hide the elastics and the braids, creating a seamless half-up hairstyle. I opted to leave the rest of my hair down and curly, rather than smoothing it like Hathaway.
The Results: A Lift, But at What Cost?
The immediate difference was noticeable. My eyes appeared more open and awake, and my cheekbones seemed a little more defined. The “instant eye-lift” effect was certainly present. I even experimented with the tighter temple-pull version, which offered a more dramatic lift, but I quickly found it became quite uncomfortable the closer it was to my face. For the sake of prolonged wearability, I stuck with the subtler “Anne method.”
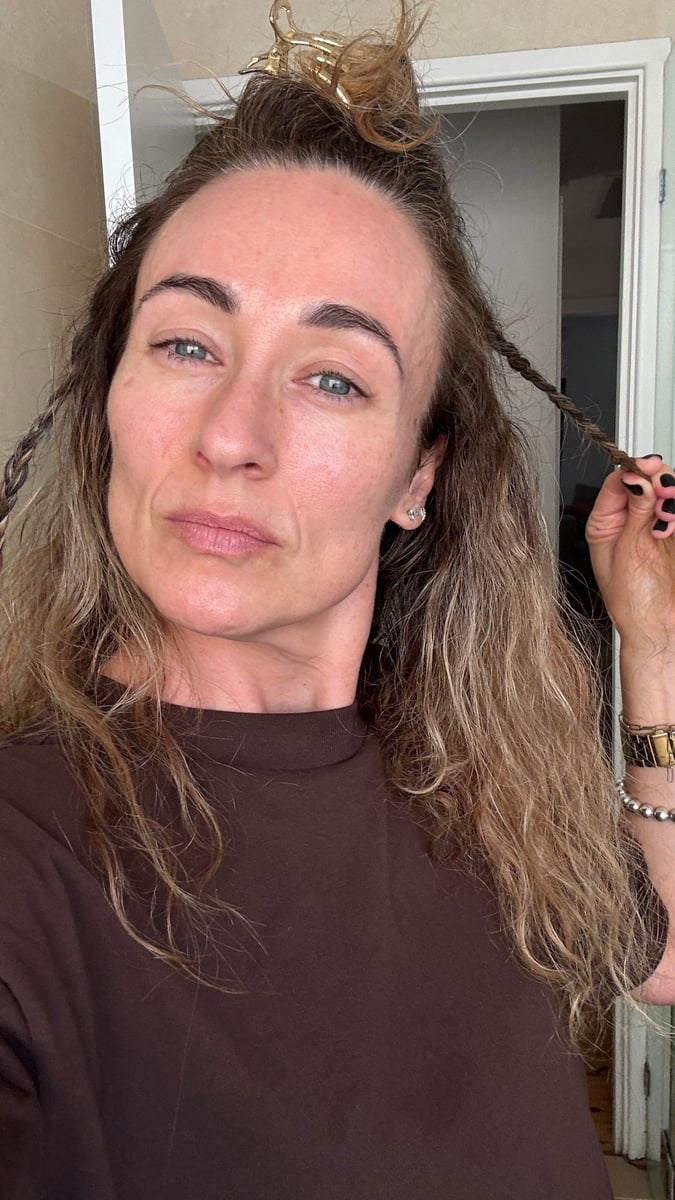
Plaits slightly further back using the “Anne Hathaway” method. Image: Supplied.
However, the positive visual effects came with a significant trade-off: discomfort. Even with the softer approach, the tension on my scalp was hard to ignore. Within fifteen minutes, I could feel a persistent “pull” at my roots. By the thirty-minute mark, while my face might have looked snatched, a low-grade headache was beginning to set in.
Despite trying to distract myself, the achy sensation lingered. The relief that washed over me when I finally removed the elastics and plaits was, frankly, heavenly. The irony wasn’t lost on me – in my quest to look less tired, I ended up enduring hours of discomfort, likely making myself look even more exhausted in the process.
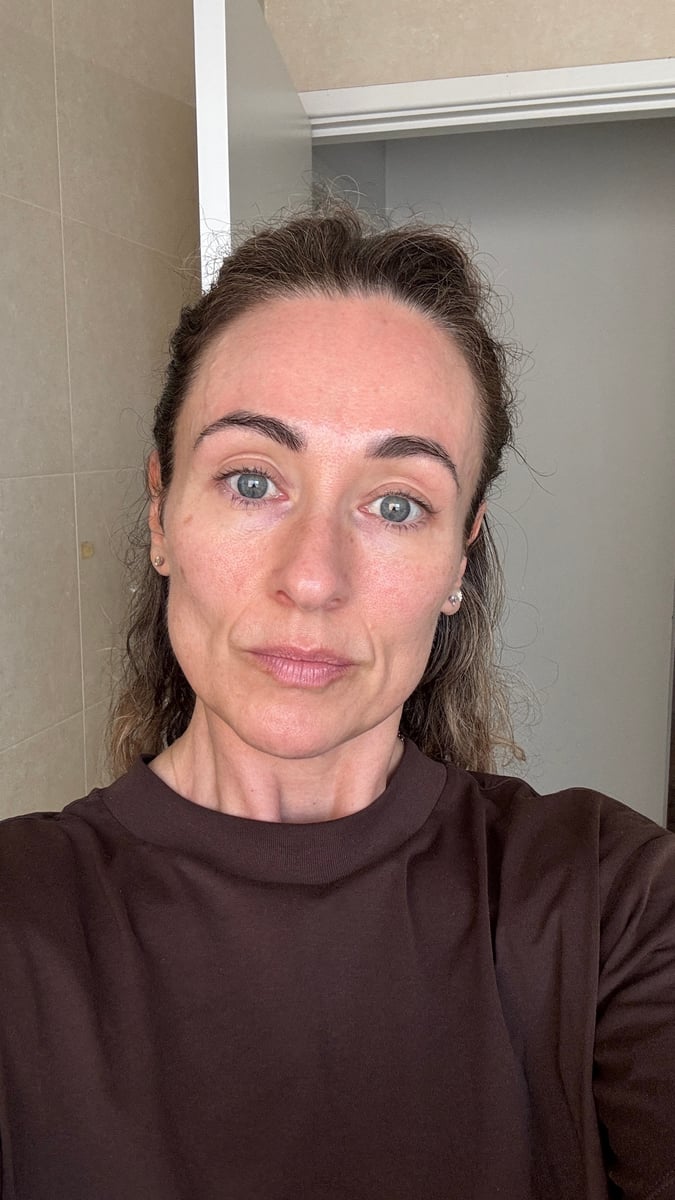
Before (no plaits). Image: Supplied.
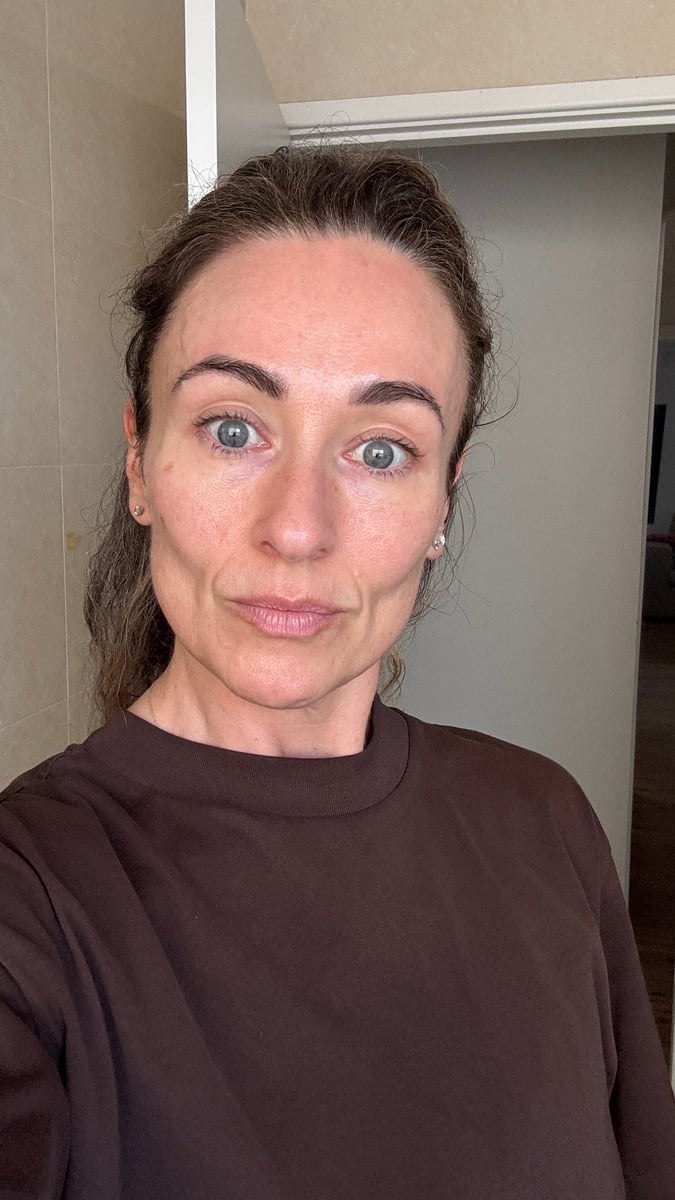
After (with plaits). Image: Supplied.
The Verdict: Overrated or Underrated?
My ultimate conclusion? This hairstyle is, in my opinion, significantly overrated when considering the level of discomfort it can induce. It’s highly probable that a celebrity stylist would loosen these plaits the moment the cameras stop rolling, making it more of a fleeting red-carpet trick than a practical all-day style. Furthermore, it’s worth remembering that the “feline” look achieved on the red carpet likely involves a combination of styling, makeup, and perhaps even professional treatments.
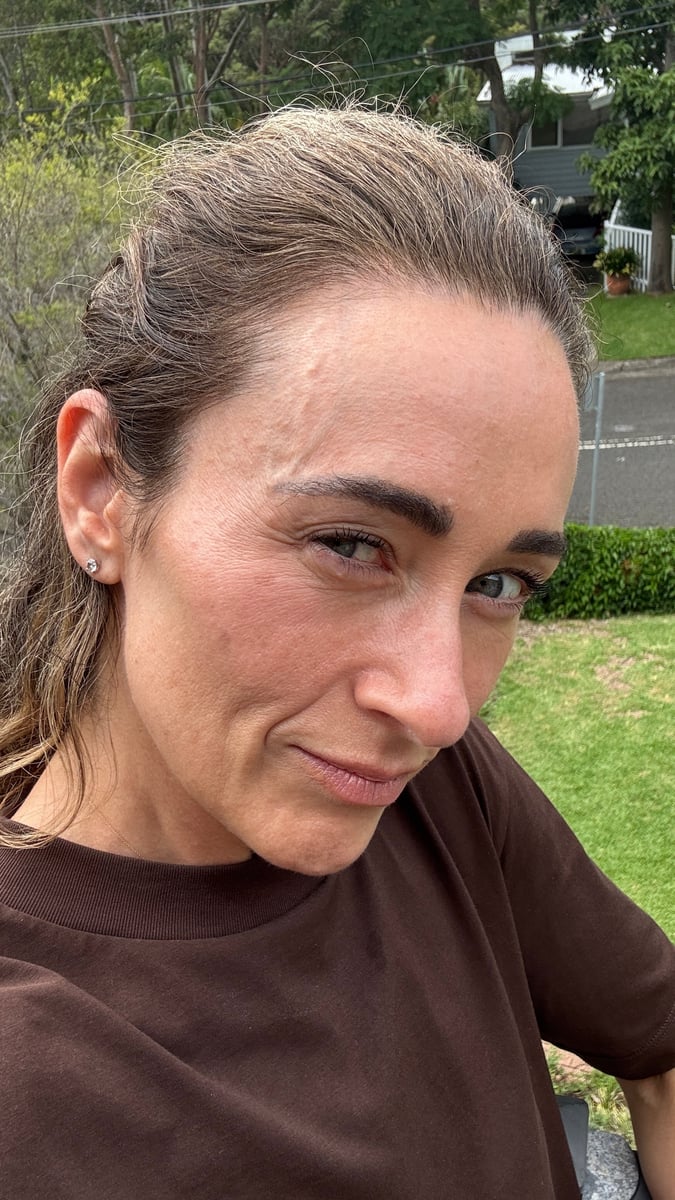
Mollie showing a throbbing temple vein after 3 hours. Image: Supplied.
Despite the throbbing temples, there were a few unexpected benefits. On a day when my hair was less than fresh, this style provided a chic way to wear it off my face, allowing me to easily apply some nourishing rosemary oil and extend my wash day. It also held significantly better than my usual half-up styles. My typical claw-clip attempts often end up slipping out and looking messy within an hour, but this plaited version remained firmly in place and looked far more polished.
Ultimately, while I won’t be subjecting my temples to that level of tension again, the experiment was a valuable reminder of how much I enjoy a well-executed half-up, half-down style, especially for managing my humidity-prone curls. I’ll certainly be revisiting looser versions of this look in the future.
For more beauty insights and product reviews, consider subscribing to the You Beauty newsletter, joining our Facebook group, listening to the podcast, or tuning into our YouTube channel.


